Light
warps of thin records can generally be corrected on the turntable during
play using a  Peripheral
record ring. But after the record has been played, the warp just stays.
To correct more severe warps in heavy records a heavier ring must be used.
But then correction is not always possible - this is so in my experience
as I have both a light weight peripheral ring and a heavy metal ring as
well. Peripheral
record ring. But after the record has been played, the warp just stays.
To correct more severe warps in heavy records a heavier ring must be used.
But then correction is not always possible - this is so in my experience
as I have both a light weight peripheral ring and a heavy metal ring as
well. |
|
| So
what to do with warped records? First let's have a look at those in a box.
Examine what sort of warp you are dealing with. Is there a curve at the
periphery at one spot caused by sagging or does the record have the shape
of a dish? First of all get rid of the soft plastic foam. Plastic foam was
maybe right at the time of production, but after so many years it certainly
has deteriorated and has lost its elasticity and consistency.
If there
is a cardboard filler, it should be sturdy and completely flat. If it is
not, throw it away as well or keep it but outside the box. |
|
|
Now
measure the size of the compartment: height and width.
|
|
| Cut
out squares of thick cardboard and make sure that they can be placed
into the box easily. |
|
| Cut
off one small corner so you will be able to take out the cardboard filler
easily if necessary. |
|
| Use
the cardboard sheet as a replacement of whatever filler there was in the
box before. See to it that the cardboard is flat and sturdy. You can choose
the thickness in relation to the space (room) you want to fill up. In the
picture at right you see ordinary cardboard. If you want you can buy a nicer
material in the art supply shop.
But it should always be completely flat and have no tendency to bend easily. |
|
| Put
the records in the box. See to it that there is no room left for sagging. |
|
|
If there is room left it is necessary to
put an extra square sheet of cardboard on top of the records before adding
the document (book or inlay). Hopefully the documents have the size of a
record and are not the smaller booklets often provided by EMI in Great Britain.
Then close the box and store it vertically. This will prevent warping and
will help correcting light warps over time. As a matter of fact in this
way time is your aid. |
|
|
So
if you encounter a box containing warped or concave records, do not throw
these away. Just fill up the empty space and make sure that there is no
room left when the box is closed! A tight fit is necessary. Store the
box on the shelf so that it is supported on both sides by other boxes
and records. It is better to store records and boxes rather tightly instead
of loose. You may discover that after a couple of weeks or a month the
records will have flattened.
It
goes without saying that the records should be cleaned or at least dusted
off with a carbon fiber record brush and with a velvet brush as well.
And see to it that the paper sleeves are free of dust particles also.
|
 |
|
This method will also work with individual
records. If you have an empty box, you can follow the method described
above. Take the records out of the outer covers and place them in between
cardboard sheets. If you do not have a box at your disposal place the
records as shown in the drawing and keep them tightly stored for at least
a month. This method works only with vinyl from the 1960s, 1970s and 1980s.
Not always for 1950s mono disks. Give it a try. And if it does not work
you always can take more drastic measures.
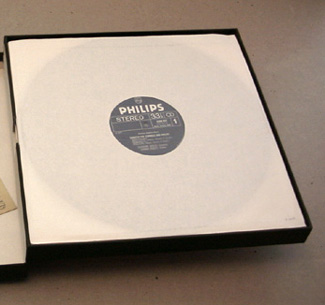
I
bought a box with the complete chamber music of Johannes Brahms. The records
were hollow shaped like saucers. I did put several sheets of cardboard
in the box. And guess what? After 2 months I discovered that the records
were flat again and remained so. And it also worked with Mozart's Violin
Music played by Henryk Szeryng and Ingrid Haebler as illustrated on this
page.
|
|
| |
|
| It
is important to check the LP cover. Sturdy cardboard covers may be no longer
completely flat. Chances are that a new warp will be produced easily. Also
gate fold covers may do harm and be the cause of a slight warp at the spine,
typically when it contains 2 records. In some cases it can be wise to put
one or more LP's in a generic cardboard cover. |
|
| |
|